OVERVIEW
Fast Tactics
- This fight has 3 phases.
In phase 1 you will fight waves of adds and deal with boss abilities. You cannot attack boss.
In phase 2 you will fight boss and remaining adds.
In phase 3 boss will cast only one ability (Core Overload) that does higher and higher dmg until the fight is over.
- PHASE 1
Dodge markings on the ground that boss shoots.
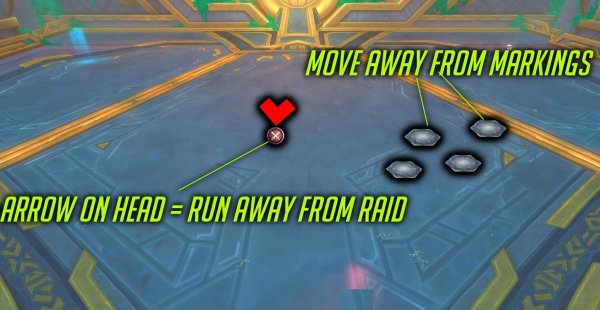
Player with arrow on head, run away from raid.
There are 4 types of adds.
You start pull with one Sentry active and boss will spawn Sentry´s periodically.
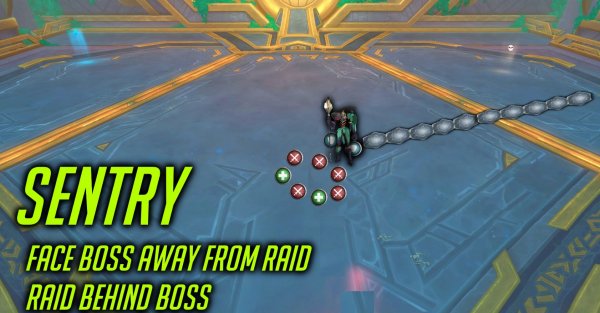
Tanks face Sentry away from raid and nuke it down, cleave the other adds until this one is dead.
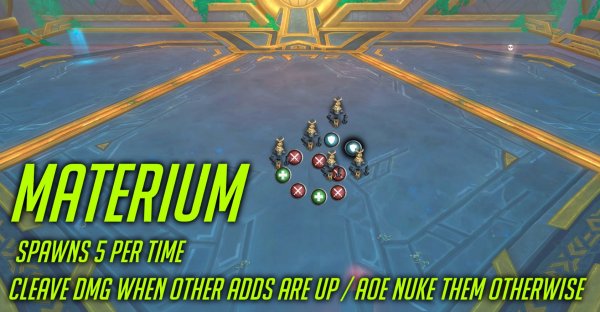
5 Smaller adds spawns periodically called Materium. Cleave/AoE them.
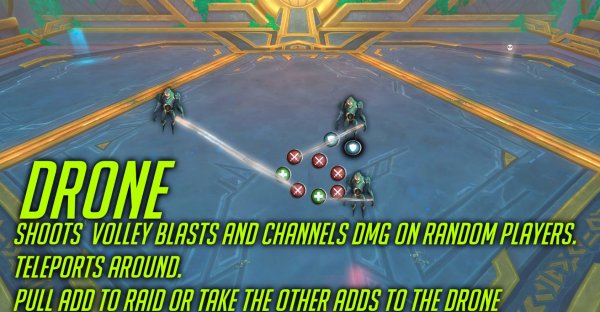
3 Drones spawns periodically. Pull them to the fight or tanks take the fight to where they are standing. They shoot at random players and teleports around.
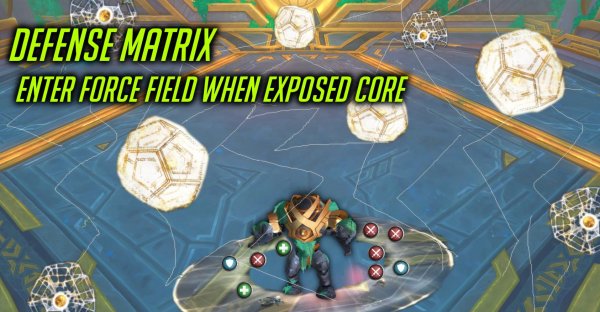
3 Defense Matrix will be active eventually. They stand still and has a Force field around them. When boss reaches 100 energy it will shoot Exposed Core. Stand inside the field then.
Normal mode the Matrix die after the Exposed Core, Heroic, you have to kill them.
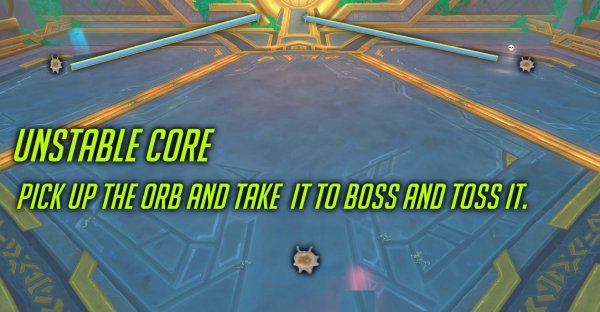
When Matrix is dead it drops an orb on the ground. All 3 orbs must be picked up and dropped at boss to reach phase 2. - PHASE 2
You fight boss and remaining adds.
Raid takes moderate dmg all the time, beware healers.
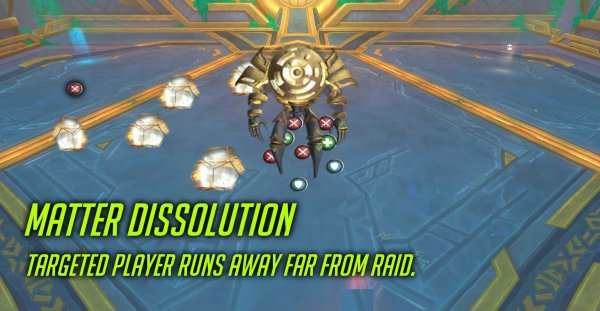
Targeted player runs far away from raid. Entire raid dodges the big orbs.
Dodge markings on ground.
Stand behind boss and tanks phase boss away from raid.
Tank swap each pneumatic impact. - PHASE 3
Use bloodlust/heroism/Timewarp and all other dps cooldowns and kill boss.
Healers beware of heavy dmg and use healing cooldowns.
POSITIONING & MARKERS
- Put a marker on far left and far right side for phase 2 targeted player.
POSITIONING
PHASE 1
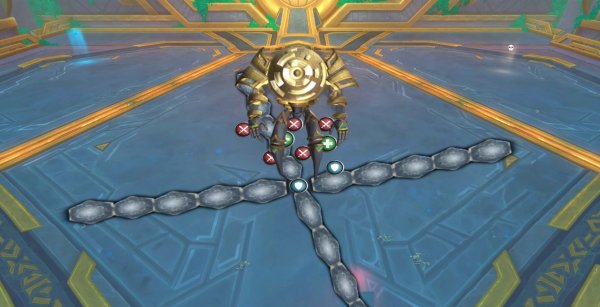
- Pull the Sentry and fight between bottom and right-side groups of adds.
- When the Force field is up, fight close to it and be ready to move in fast when boss does Exposed Core.
PHASE 2
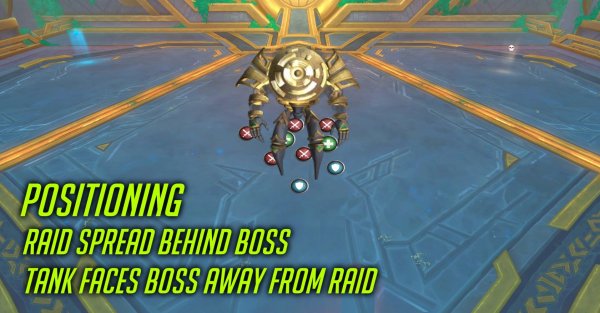
- Raid spread behind boss.
- Face boss away from raid.
BOSS ABILITIES & TACTICS
PHASE 1
ADDS
You will fight 4 different types of adds.
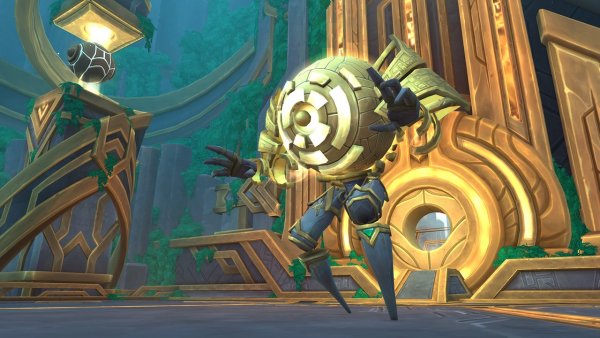
- Pre-Fabricated Sentry
- Volatile Materium
- Point Defense Drone
- Automated Defense Matrix
A Sentry will be at pull, and boss will spawn a Sentry periodically.
Boss will activate 5 Materium´s periodically.
Boss will activate 3 Drones periodically.
The Defense Matrix will be activated after waves of adds are dead.
Sentry
- At pull there is only one Sentry.
- Boss will spawn another Sentry periodically during the encounter.
- Drones have two different abilities.
Wave of Disintegration
Smashes ground and creates a frontal line marking on the ground, that explodes and does very high cosmic dmg to players inside the markings.
Dissonance
When add reaches 50 energy is hits tank with high Cosmic dmg that leaves a debuff that increases dmg taken by next Dissonance by 20% for 20 sec and stacks.
Tactics: Sentry
- Tanks, face the Sentry away from raid.
- Tanks make sure to balance the Dissonance debuff when more Sentry are up.
- Focus nuke Sentry and cleave the rest when a Sentry is up.
Materium
- These spawns 5 at a time.
- They do melee dmg and can be tanked.
- Their movement speed is increased by 20% and dmg increased by 10% for every 10 second it is alive.
Tactics: Materium
- If other types of adds are alive then only cleave dmg on them.
- Group them up and AoE them down when no other types of adds are alive.
Drone
- Boss spawns 3 Drones at a time.
- Drones shoots volley Blasts at random players that does high Cosmic dmg.
- Drones teleports to a random player and channels moderate Cosmic dmg every 1 sec for 12 sec.
Tactics: Drones
- Do not stand spread out, semi stack up so that the Drones can be killed faster.
- The channel could be interrupted in PTR testing, try to interrupt the channel.
- Pull the Drones to group you are attacking.
- Tank walks to the drones with its adds if they are further away.
Defense Matrix
- There are 3 of this add, one on each side.
- This add is active later in the fight when more adds are dead.
- It stands still on its position and creates a force field around it.
- Standing in the force field reduces dmg taken by the Exposed Core (that boss does) by 90%.
- All 3 adds die after the Exposed Core on normal mode.
- On heroic, they are alive and attacks the raid.
It has a force field around it that shields other adds by 90%.
It channels cosmic dmg at random players every 1 sec for 12 sec. - When a defense Matrix dies, it leaves an orb on the ground (Unstable Core). If picked up, it slows the player by 50% and does low Comisc dmg every 1 sec. This Core does dmg on boss when running with the core to the boss.
Tactics: Defense Matrix
- Fight close to a Force Field.
- Make sure you are inside when boss casts Exposed Core.
- HEROIC MODE – Tank the adds away from the Matrix add and full nuke on the Matrix adds so they die fast.
- 3 players must run and pick up the 3 robs and run to boss with it.
When you click on the orb, you get a new action button UI “Drop Unstable Core).
Run to boss and click on the button to drop the orb at boss. - When all 3 cores hit boss, it comes out from the wall.
PHASE 1
BOSS
Boss is protected inside the wall during phase 1 and does abilities on the raid.
In phase 1, boss will also activate waves off adds.
Boss does low dmg to all players every 3 sec.
Boss targets several player locations with markings on the ground. After a couple of seconds it explodes and does very high Cosmic dmg.
Boss targets a random player with an arrow on their head. After some seconds the boss shoots beam that travels on random direction on the ground. Getting hit does moderate Cosmic dmg.
TACITCS: BOSS IN PHASE 1
- Healers beware of constant raid dmg.
- Move away from the markings on the ground fast.
- Player with arrow on head, run away far from raid before boss shoots.
PHASE 2
BOSS
Boss comes out when all 3 orbs hit it, and it comes out with 40% health.
You will fight boss and the remaining active adds.
All players take moderate Comic dmg every 3 sec (Fractured Core), beware healers.
Matter Dissolution
- Boss targets a player.
- After 10 sec, that targeted player will shoot out small orbs on random locations.
- The orbs become huge and move toward the marked player.
- Each orb does very high cosmic dmg to any player it hits and leave a debuff that makes you take 100% more dmg from other orbs for 10 sec and stacks.
- The targeted player is slowed by 50% for 10 sec when orbs despawns.
Tactics: Matter Dissolution
- Targeted player runs far away from raid.
- When you see where the small orbs will land, move away fast from them before they grow and moves.
- The targeted player should also move away fast once the orbs has been launched away.
Refracted Blast
- Boss shoots on random player locations with markings on the ground.
- After some seconds they explode and do high Cosmic dmg.
Tactics: Refracted Blast
- Dodge the markings on the ground.
Split Resolution
Boss hits the main tank with very high cosmic dmg.
The hit creates several lines of markings on the ground that moves outwards.
The markings explode and does high dmg to anyone caught in it.
Tactics: Split Resolution
- Face boss away from raid when tanking it.
- Raid behind boss.
- Entire raid moves away from the markings.
- Move back to positions again.
Pneumatic Impact
- When boss reaches 50 energy it will slam the tank with deadly cosmic dmg.
- Leaves a debuff that increases dmg taken by this ability by 200% for 45 sec.
Tactics: Pneumatic Impact
- Use heavy defensive
- Tank swap each pneumatic impact.
PHASE 3
BOSS
When boss has 15% health it will go in to mini enrage, called Core Overload.
Boss will go down on one knee and stop doing abilities on raid.
Boss will start doing moderate dmg to all players every 3 sec, and the dmg increases by 25% every 3 sec until the fight is over.
Tactics: Core Overload
- Use dps cooldowns and kill the boss before it kills you.
- Use bloodlust/heroism/Timewarp.
Other posts
- The BEST Midnight Season 1 DPS Tier List Guide
- Midnight Pre-Patch Event Guide: Twilight Ascension Rewards, Rare Timers, and Collectibles
- Endeavor: A Deeper Dive Into WoW’s Expansive New System
- LOADS of Extra Decors You Did NOT Know About!
- World of Warcraft Players Score Exclusive Housing Decor with Diablo 4: Lord of Hatred Pre-Order
- Brawler´s Guild 2025 GUIDE
- Legion Remix Decor will be available after Legion Remix
- Professions Unpacked: Your Guide to Crafting Housing Decor with Reagents from Every Era
- WoW Housing: Best Tips Guide
- Everything Coming in World of Warcraft Patch 11.2.5
